Here in the mountains and foothills of central Idaho, three generations of my family have developed natural springs in order to graze dryland pastures. In addition to the obvious breakouts where water puddles on the surface, many areas where lush underbrush or groves of aspen, chokecherry or cottonwood trees grow, water is present very close to the surface.

Locate a natural spring
Not all of the geography in the West is conducive to carrying water under the surface, but there may be water where you least expect it. The water may be just a few feet under the surface, running on a layer of clay or bentonite, and has not been forced to the surface.
Some fractured rock structures are ideal to carry water through the ground from snow that melted in the high country months earlier. Also, subterranean courses of sand and gravel can provide a channel for underground water.
Before developing a spring for stock water, contact your state water resource agency to determine if you need to file on the water in order to use it.
Cindy Yenter with Idaho Department of Water Resources in Salmon, Idaho, says, “For new developments, a water right permit must be obtained before work begins.”
To determine if there is enough water to justify the labor and materials required to develop a stock water system, begin by digging around the area. Many good water sources can be developed within 2 to 3 feet of the surface.
As you dig, watch for water seeping in from the sides and bottom of the hole. Once you have dug into the water course far enough to bail the water out with a pale or jug, allow the water to rise as far as it will and bail it into a gallon container.
By timing and measuring the recharge, you can calculate the rate of flow. A spring that produces 1 gallon a minute will fill an 8-foot-by-2-foot round tank (750 gallon) in 12.5 hours. We have successfully provided water to areas of dry pasture with as little as 0.25 to 0.5 gallons per minute.
Determine a location for the water trough
The location for the water trough must have adequate slope or fall away from the spring to ensure that the water will gravity-flow from the spring into the trough. An inexpensive way to determine the fall from the spring to the potential trough site requires the following: one or two helpers, one wooden stake, a string line, a string-line level and a measuring tape.
Drive the wooden stake firmly into the ground near the edge of the hole. Tie the end of the string line securely to the stake a few inches above the ground. Stretch the line out tight to the potential location for the water trough. Place the string-line level halfway between the spring location and the potential location for the trough.
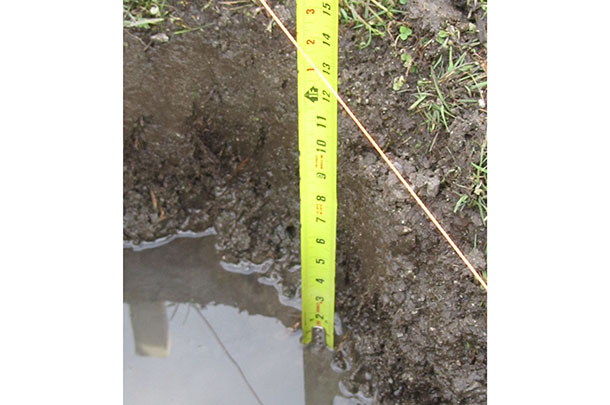
Raise or lower the end of the line until the line is level. Measure the distance between the string line and the top of the water in the hole. Because you will not be able to effectively draw water from the surface level, drop the end of measuring tape into the water a minimum of 6 inches.
Next, measure the distance from the end of the line at the potential trough location to the ground. Subtract the first measurement. Subtract the height of the water trough, plus support structures, if any, from that number. The remainder is the amount of fall from the spring to the top of the trough.
If the amount of fall is equal to or greater than the 6 inches you added initially, you have adequate fall to install the trough with minimal dirt work.
If the amount of fall is less than 6 inches, you will need to move to another location with more fall or plan to excavate a pad to a depth that allows sufficient fall.
Install the water trough and connecting pipeline
If you are using a freestanding trough, make sure the ground is level before installing the trough and retaining posts. If you are supporting the trough with a pressure-treated wood frame, ensure the frame is level as you attach the wood to the support posts.
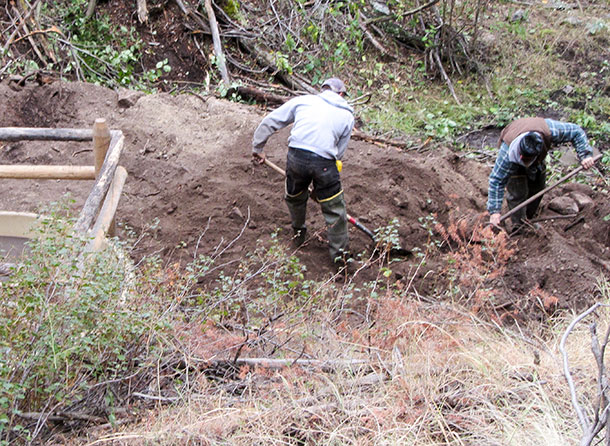
As you trench between the spring and a support post at the trough, leave a small amount of earth unexcavated to hold the water in the spring. The bottom of the trench should be set to the depth you plan to take the water out of the spring. A minimum depth of 2 feet will help prevent future damage from cattle and wildlife traffic.
To maintain a constant downhill slope, use a level taped to a straight 2-inch-by-4-inch-by-10-inch board as a guide. Calculate the rate of fall per 10 feet by dividing the fall by the distance between the spring and the trough, and then multiplying by 10.
As you dig, move the level along the bottom of the trench, checking the fall of the trench every 10 feet. To do this, keep the board level and measure the down-trench gap between the bottom of the board and the bottom of the trench.
A high spot in the pipeline will cause an accumulation of air to stop the flow of water. This condition is called “air lock” and must be corrected before the line is buried. Using the same method, dig the overflow line.
Install 1 ¼-inch black poly pipe from the spring to the trough. Use nylon 90º fittings and hose clamps to run the pipe into the trough. Plumber’s strap works well to attach the inlet pipe to a post and rail to prevent cattle from knocking the inlet out of the trough.
Install a collection device (spring box)
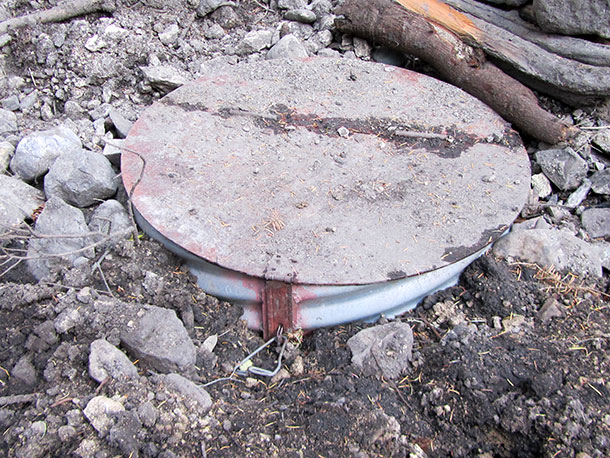
Cut a piece of 18- to 24-inch culvert to reach from the bottom of the hole to a little above ground level. Cut a hole 6 inches from one end of the culvert and install a 1 ¼-inch galvanized, barbed hose fitting. Use a torch or drill to make a series of 3/8-inch holes about 6 inches apart around the circumference of the culvert.
Start a few inches below the outlet and continue 18 inches above the outlet. Fabricate a mouse-proof lid from a piece of sheet metal or anything that will fit snugly over the top of the culvert. Mice or other miscellaneous debris will plug the pipeline.
Excavate the diameter of the spring to allow some space around the outside of the spring box. Fill the void with gravel or rocks. This will allow the water to travel into the spring box. Do not fill this void with dirt. Dirt will seal the holes into the spring box.
Breach the earth dam that you left in the trench and connect the poly pipe to the barbed fitting and secure with a hose clamp.
If the pipeline does not have any high spots, the water will begin flowing into the trough. If the water does not flow into the trough, check and correct any high places in the pipeline. Once water begins flowing into the trough, backfill the trench. Be careful to bed the pipeline with fine material.
Once you have a minimum 6 inches of cover over the pipeline, you can safely push in all of the excavated material. Watch for large rocks and try to place them well above the pipeline.
Reclamation
Shannon Williams, Lemhi County extension educator, says, “If your goal is to reinstate forage primarily for cattle, you want a blend of dryland grasses and alfalfa seed. To balance for wildlife, the blend may include more native species containing forbs and brush.
If you are reclaiming a project on federal or state land, check to see if there’s a prescribed mix and always obtain the seed from a reputable supplier. The last thing you want to do is introduce unwanted weeds into your reclamation project.”
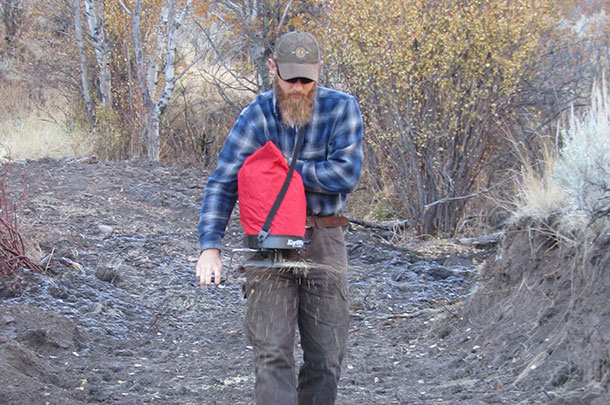
Due to the rugged nature of this country, we hand-broadcast a prepared blend of crested wheatgrass, orchardgrass and dryland alfalfa late in the year. Cattle and wildlife traffic aid in seed-soil contact. We monitor the seeded areas throughout the following year and spot-seed areas as needed. ![]()
PHOTO 1: A new installation shows inlet and overflow pipeline.
PHOTO 2: The author uses a string line and string-line level to determine the height of the water in the springhead in order to calculate the necessary fall to a potential water trough location.
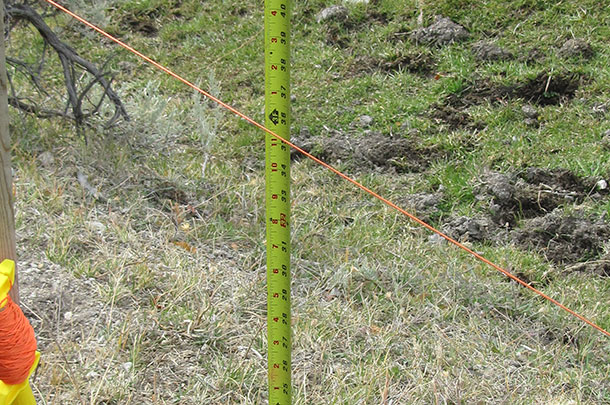
PHOTO 3: fter establishing a baseline elevation at the springhead, the author uses string line and string-line level to calculate the amount of fall to a potential location for the water trough.
PHOTO 4: A spring box with sheet metal lid – welded to culvert around one half with a hinged seam in the center.
PHOTO 5: The overflow pipe is buried.
PHOTO 6: Hand-broadcasting seed to reclaim disturbed soil after pipeline installation. Photos provided by Michael Thomas.
Michael Thomas is a freelance writer based in Salmon, Idaho. Email Michael Thomas.