That’s because dry matter losses, also called shrink, consume the most valuable silage nutrients, which must then be replaced with an equal energy source, such as corn grain.

Key silage storage management principles
These losses begin with plant cell respiration and aerobic microflora utilizing carbohydrate sources (primarily sugar) that produce water, heat and carbon dioxide. These processes will continue until the trapped oxygen in the silage mass is depleted.
Proper plant moisture and compaction play key roles in reducing the length of this aerobic phase in the storage structure by reducing silage porosity.
Sufficient moisture
The subsequent anaerobic phase establishes an environment suitable for domination by homofermentative and heterofermentative lactic acid bacteria (LAB). The bacteria that create desirable fermentation need water to live, grow and produce acid.
Sufficient moisture also enables the producer to expel air in the silo more efficiently. These anaerobic fermentation losses can be reduced by 25 percent or more with the use of homofermentative strains found in a research-proven, reputable silage inoculant.
It is best to avoid harvesting corn silage when it is too wet. Plants should have sufficient maturity and strength to ensure optimal nutritional value from each crop acre. Mature plants are less likely to crush in the silo, so seepage is also less likely. Effluent (seepage fluid) is rich in sugars and readily digestible nutrients that can be lost with wet silage.
Compaction
The operator on the silage packing device is the critical link to improve density. Poorly packed, low-dry matter silages will have extended plant cell respiration, resulting in an increased loss of digestible nutrients. Entrapped air can allow for the growth of aerobic organisms (harmful yeasts and molds), detrimental to the ensiling process.
Regarding silage storage and management, Brian Holmes, University of Wisconsin – Madison and Keith Bolsen of Kansas State University offer several key considerations:
-
Check silage densities. Only do this if it can be done safely. Be prepared to adjust filling and packing procedures.
-
Reduce forage delivery rate. This is difficult to accomplish, as few are inclined to slow the harvest rate. Advance and ongoing communication is critical.
-
Employ well-trained, experienced people. This is especially important for those operating the push-up/blade tractor or tractors. Provide training as needed and emphasize safety.
-
Increase rate of forage push-up and packing. By increasing this relative to the harvest rate, producers will reach the target density.
-
Spread forage consistently. Do this continually in thin layers of 6 to 8 inches during the entire filling and packing operation.
-
Increase packing tractor weight. Poor packing density leads to problems with aerobic stability, especially in warmer weather.
-
Increase the number of packing tractor passes over all forage layers. Caution: Additional tractor passes require more packing time per ton.
-
Consider drive-over piles. Silage piles need to be constructed correctly to be cost-effective. All four sides of the pile (two ends, two long sides) need to be well packed.
All four sides need to be on a slope shallower than 1-foot rise to 3-feet run so a packing tractor can get up and over. Piles need to be packed lengthwise and crosswise. That is why the large footprint is required.
Management steps to minimize or prevent surface-spoiled silage
-
Shape all surfaces so water drains off the bunker or pile. The back, front and side slopes should not exceed a 3-to-1 slope. Seal forage surface immediately after filling is finished.
-
Use two sheets of plastic or a sheet of oxygen-barrier film; both are preferred to a single sheet of plastic.
-
Overlap sheets that cover forage surface by a minimum of 4 to 6 feet.
-
Arrange plastic sheets so runoff water does not come into contact with silage.
-
Ensure that sheets reach 6 feet off the forage surface around the perimeter of a drive-over pile.
-
Put uniform weight on the sheets over the entire surface of a bunker or pile and double the weight placed on the overlapping sheets. Bias-ply truck sidewall disks, with or without a lacework of holes, are the most common alternative to full-casing tires.
Sandbags filled with pea gravel offer an effective way to anchor the overlapping sheets, and they provide a heavy, uniform weight at the interface of the sheets and bunker silo wall.
Sidewall disks and sandbags can be stacked; if placed on pallets, they can be moved easily and lifted to the top of a bunker wall when the silo is being sealed and lifted to the top of the feedout face when the cover is removed. A 6- to 12-inch layer of sand/soil or sandbags offer an effective way to anchor sheets around the perimeter of piles.
-
For many years, full-casing discarded tires were the standard tools used to anchor polyethylene sheets on bunkers and piles. However, these tires are cumbersome to handle and messy. In addition, standing water in full-casing tires can provide a breeding ground for mosquitoes that may carry the West Nile virus.
-
Prevent damage to the sheet or film during the entire storage period. Mow the area surrounding a bunker or pile. Put up temporary fencing as safeguards against domestic and wild animals.
- Regular inspection and repair are recommended because extensive spoilage can develop quickly if air and water penetrate the silage mass.
Feedout management
Proper silage feedout management is essential to maintain consistent and high-quality ensiled forages and high-moisture grains. Research shows that poor face management can easily double shrink losses. Besides the financial loss associated with shrink, feed quality and consistency can vary dramatically and may contribute to livestock production and health problems.
Porosity is the enemy, so proper moisture (to fill in the air spaces), particle size, compaction (density) and sealing methods are also key to maintaining anaerobic conditions.
It also is advisable to remove and dispose of visibly moldy feed from the sides or top of the storage structure and not allow loose, aerated silage to pile up for extended periods of time before feeding.
Silages should be removed from bunker and pile faces by mechanically shaving the silage face from top to bottom or peeling the silage horizontally with a front-end loader bucket.
This is preferred to lifting the bucket from the bottom to the top. Lifting creates fracture lines in the silage mass and allows oxygen to enter, promoting aerobic activity.
Even when removing the desirable 6 inches daily from the silo face, oxygen can penetrate several feet into the stored mass. This facilitates heat-generating aerobic activity which may not fully dissipate from the face.
Silage facers are becoming increasingly popular. They “blend” feed across the entire face and cleanly remove silage without disrupting compaction, which often is the result of improper use of the front-end loader. Use of forage additives containing L. buchneri allow for reduced feedout rates while maintaining aerobic stability.
Start with a comprehensive silage harvest and storage plan. Meet with your forage resource team to develop a plan to reach your harvest, storage and feedout goals.
Harvest-time decisions affect silage quality in the pile and bunker and can lead to lower nutritional value, safety concerns, increased mold or yeast, excessive shrink and reduced intakes and performance issues. ![]()
PHOTO 1: Silage should be removed from piles mechanically by shaving from top to bottom or peeling horizontally.
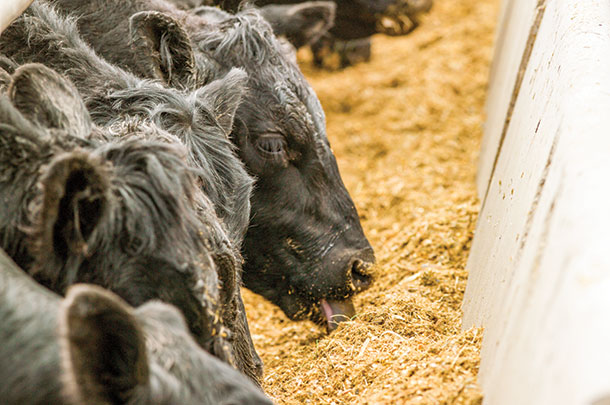
PHOTO 2: Without proper face management, feed quality can vary and pose production or health problems for livestock. Photos provided by DuPont Pioneer.

-
Bill Ramsey
- Western Livestock Information Manager
- DuPont Pioneer
- Email Bill Ramsey